Get The Best Out of Your Raw Files Before Retouching
As a professional photographer, I am sure you only shoot in Raw format. But do you pull all of the good color and luminosity data out of your Raw files before taking them to Photoshop for retouching?
Today, I want to share with you how I prepare my Raw files for retouching. I believe this is a very important step in retouching workflow, but from my observations over the years, very few photographers and retouchers do this.
While you may not need to do this with every image, it is an extremely helpful method to know so you can always salvage a shot that was not captured perfectly.
I recorded the video at the end of this blog post quite a few years ago (I had a funny accent! Why do I hear “meat tones” instead of “midtones” now 😂), but my approach is the same today regardless of which Raw Converter software I am using.
Adding Extra Volume & Depth in a Raw Converter
We shoot in Raw format because it records a lot of light and color data in each file, and all that data is quite moldable while a file is being processed in a Raw Converter – Adobe Lightroom, CaptureOne, or Photoshop’s own CameraRAW.
When we export a file out to Photoshop, we discard all that visual information that provides that insane flexibility.
It only makes sense to leverage that abundance of data within a Raw converter before it gets compressed.
Personally, I prefer working in Lightroom simply because over the years I developed a perfect workflow that allows me to handle large photoshoots quickly. But the principles I mention below are applicable to processing files in any Raw Converter.
Here are a couple of notes before I explain this multi-conversions method:
- Not every photo will require this treatment, especially if your lighting and colors are spot-on in your original capture. But it’s good to know what you CAN do with your Raw files, for when you do need it.
- This quick process doesn’t take me more than a minute to go through.
- Many things can be corrected in and pulled out of the Raw files before retouching, but my focus is usually on Luminosity and Colors – that’s where you can get away with pretty dramatic adjustments without losing any data or getting noise, artifacts, or clipping of shadows or highlights. After that, all of the pixel-pushing activities are best done in Photoshop.
- What I want as a result is to have a well-pronounced visual separation between the midtones and highlights on the skin. Most of the skin values on the face and the body should fall into the midtones category rather than the highlights. Generally speaking, that’s the goal that I keep in mind throughout the entire image creation process: when I’m setting up my lighting, preparing my Raw files, and retouching my images in Photoshop. One of the most common mistakes that I see in beginner photographers’ and retouchers’ work is the lack of that separation.
So, let’s see what I’m talking about.
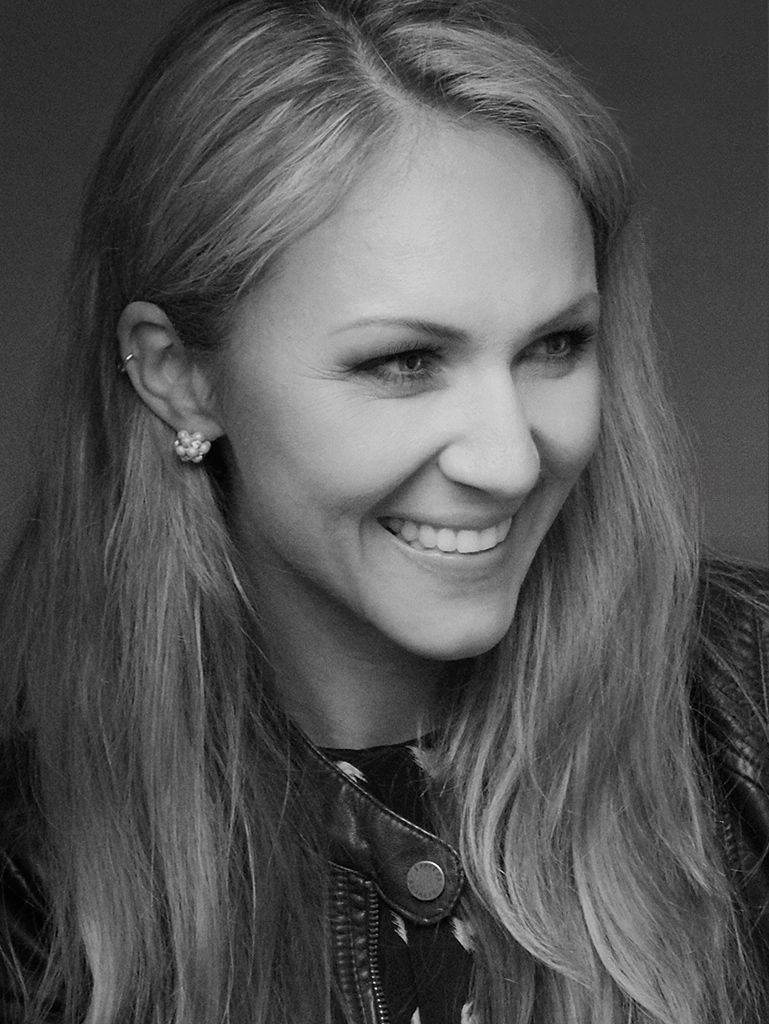
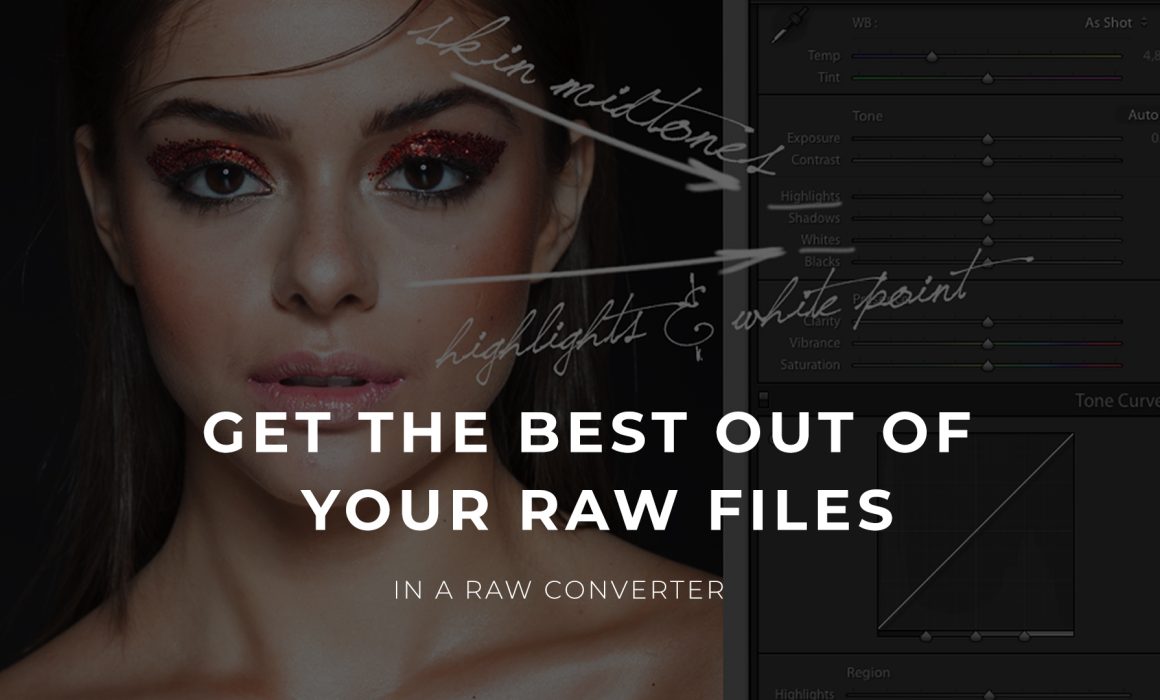
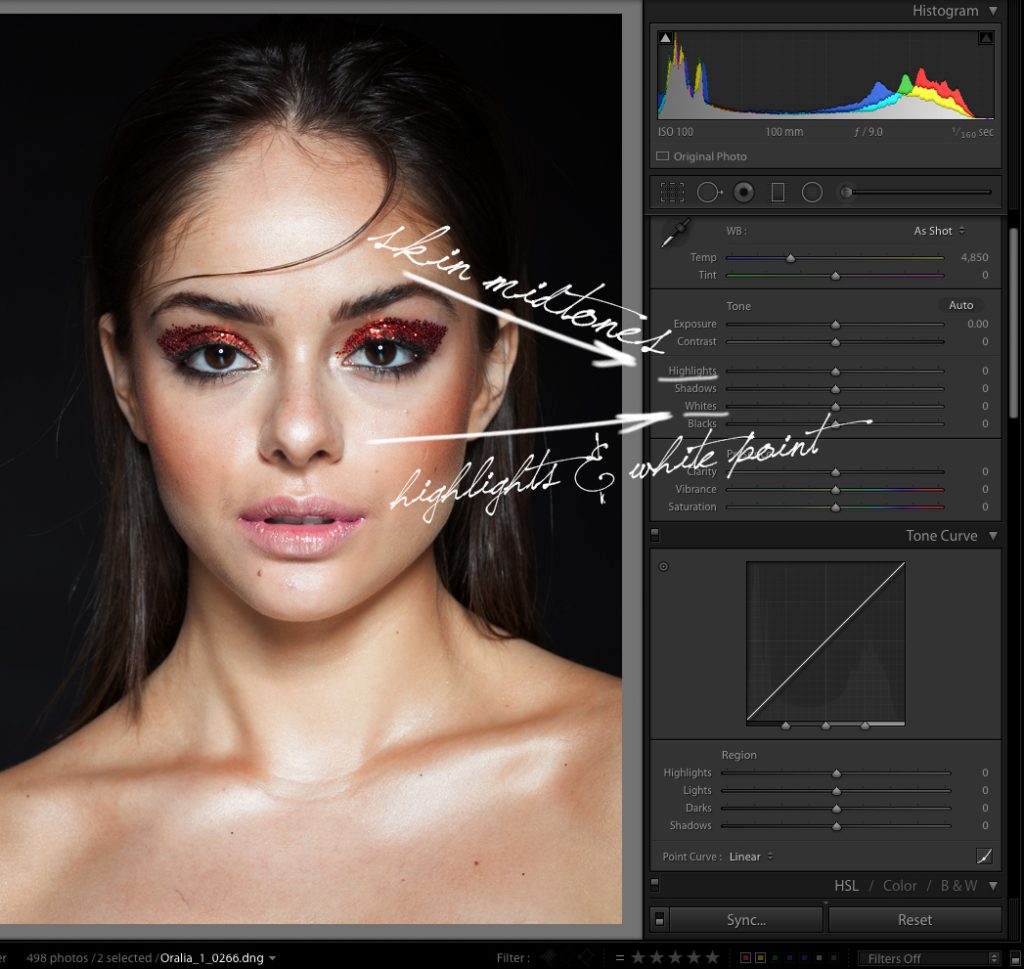
Here is a photo of the gorgeous Oralia Cortes, makeup and hair by my dear fried Lupe Moreno from my one-on-one Studio Beauty Photo & Retouching training for one of my students.
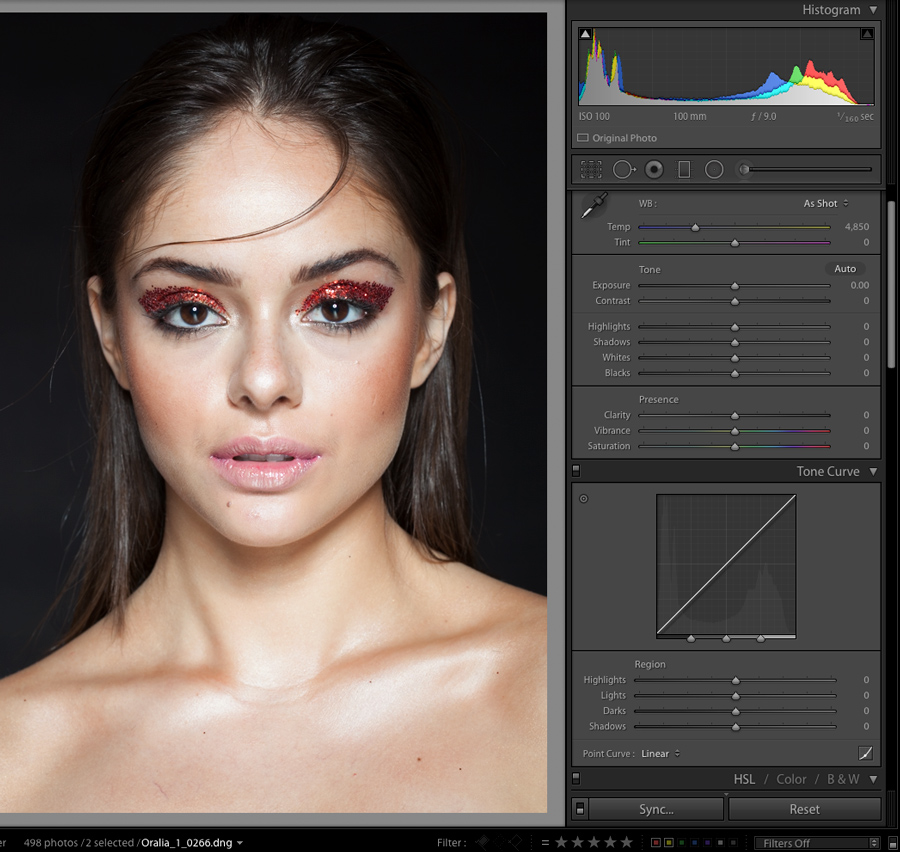
The photo is correctly exposed, but there are a few things that I normally adjust at this stage:
📌 While the overall exposure is correct, the skin reflects more light than I’d like, we see more highlights than midtones on the face. The midtones are where the beautiful skin texture and color are most visible, so I want to see more of that.
📌 The red glitter eye makeup can use some extra saturation and contrast.
📌 I’d like to take out some magenta out of the lips. This was one of the last looks in the shoot, and the pigments of the lipstick that we used before this look stained Oralia’s lips. It wasn’t apparent during the shoot, but now we can see that the color of the lips is a lot more magenta than the hues of the rest of the makeup.
📌 I don’t mind the darkness of the background, but maybe a little more separation between the edge of the hair and the background will make it look a little more 3-dimensional.
📌 In Adobe Lightroom, Virtual Copies allow users to make copies of the original image with any adjustments they wish to apply, without duplicating the file itself and using up a very minor amount of space.
Here’s how I go about correcting those things and extracting them to Photoshop independently:
This process is very quick, but very useful, especially for beginner photographers who haven’t nailed their lighting yet.
If you don’t want to bother creating a handful of additional conversions, at least get familiar with the Highlights and Whites sliders so you always extract the best-looking skin!
If you enjoyed this, check this blog post:
Or this: